Use of the right gauge part in a single needle lockstitch machine can simplify the complex operations to achieve higher productivity while reducing operator skills which is usually wasted while handling or manipulating different parts.
The sewing process is completed in two steps: Feeding of the fabric in and out of the needle plate, and formation of stitch. So, the gauge parts are also divided into two categories depending on whether they feed or stitch. Presser foot, needle plate and feed dog are feeding gauge parts, while, needle, hook set, bobbin and bobbin case are sewing gauge parts.
The first prerequisite for a perfect seam is correct feeding; therefore an accurate control of fabric under the presser foot by the operator is very important. To perform the task with high accuracy requires highly skilled operator, but unfortunately the operation with such skill levels are not easy to train and retain. It is better to use compatible gauge parts for controlling and guiding fabric.
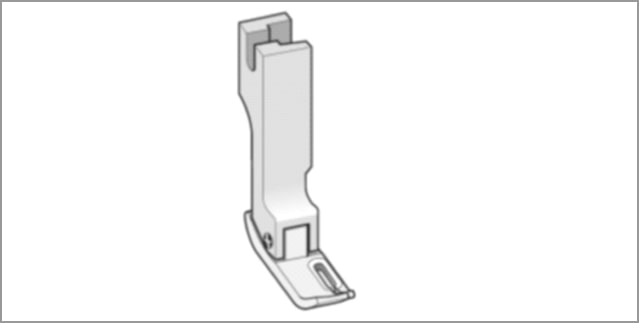
Presser Foot
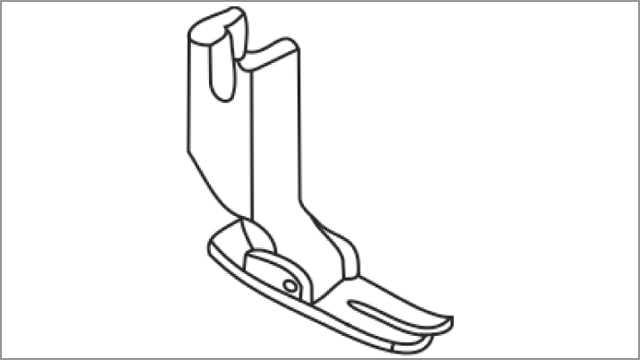
The basic purpose of a presser foot is to hold the fabric in place while it is moving through the sewing machine but the availability of 200 different mechanisms and styles in pressure feet emphasis more than that. The different presser feet manipulate the fabric in a certain way to obtain the desired quality results and also help improve productivity. While you can do the majority of your sewing with just one basic foot, other specialized presser feet can make more complex sewing tasks easier such as hemming or gathering fabric or reduce pucker.
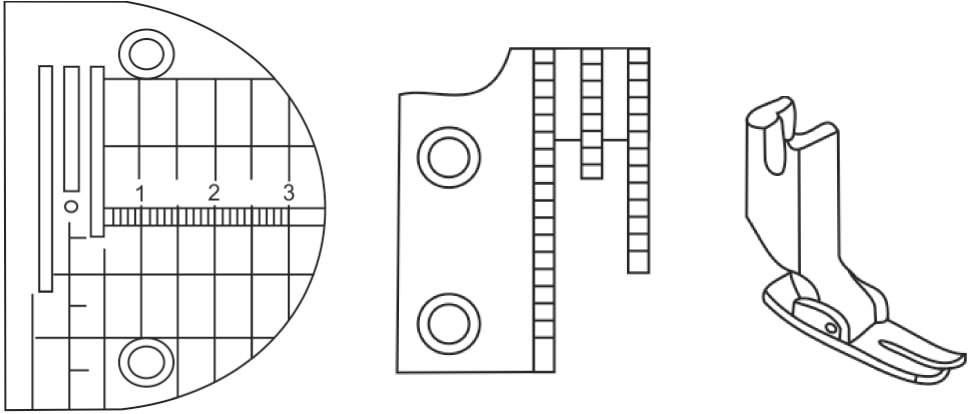
Presser foot (and feed dog) for straight seams
Contact area of presser foot with feed dog, on all four sides of the needle, feeds the fabric.
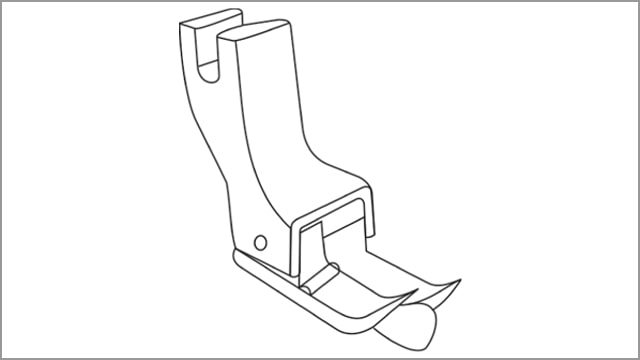
For stitching straight seams, a presser foot with even toe (having both toes equal) coupled with a 4 row feed dog is most appropriate (Figure 1).
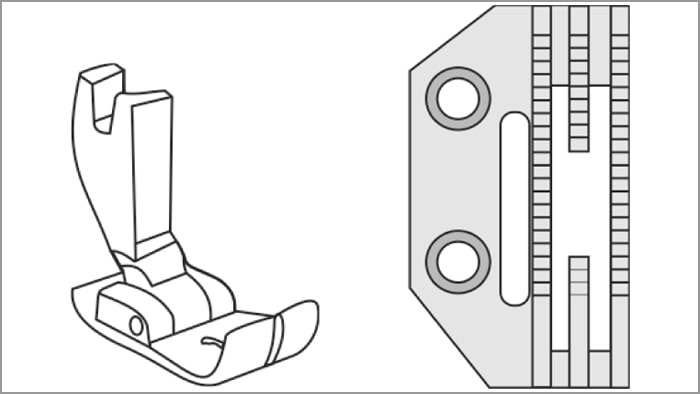
The contact area of feed dog with presser foot on all sides is equal, so feeding is also equal on all sides. Also, due to proper grip on all sides, the fabric wavers less, ensuring that the feeding is perfect for straight seams. Moreover, in a 4 row feed dog, there is an additional row of feeding teeth which gives support to the fabric at the centre. All these factors contribute their bit in reducing the skill requirements of the operator, making it possible for him to work with higher degree of concentration on a straight seam.
For accurate straight line sewing, the fabric piece to be sewn is fitted in a stitching template made of acrylic and the operator just needs to guide the template to the needle on a track made on the machine bed. This system of tracks not only improves accuracy but also increases the sewing speed.
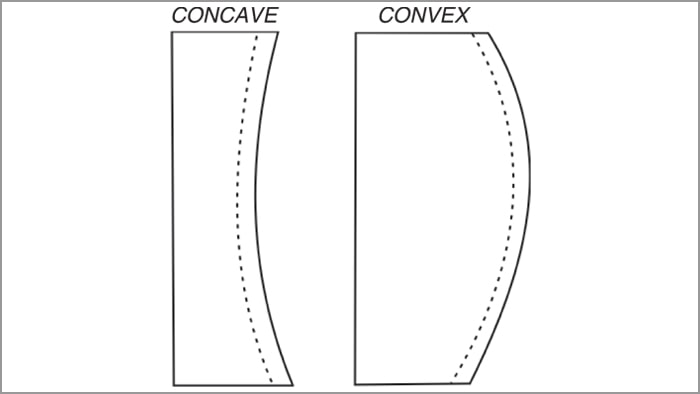
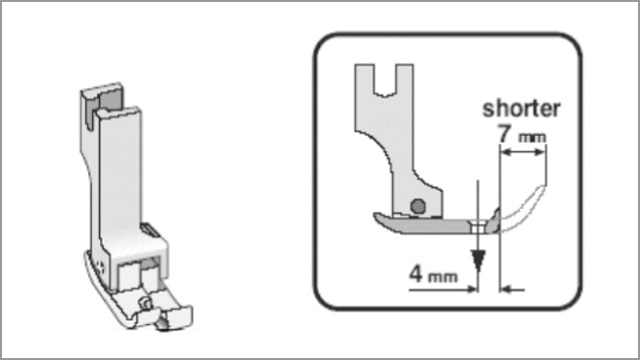
Presser foot (and feed dog) for curved plies
For curved plies, feeding is not necessarily required to be equal on all sides as in a curve, the length of the edge is not equal (it is longer or shorter, see Figure 2) to the length of the seam. In this case, a feed dog with three rows along with matching presser foot with shorter right toe is most suitable. Since the left toe of the feed dog is longer, the feeding in the left is more and this facilitates easy handling of the heavy bulk of the fabric hanging on the left side of the needle. Also, foot contact with the feed dog in the right of the needle is less. This means that the grip on the right side is less, making it easy for the operator to adjust the curved plies near the needle.
If we use a feed dog with three rows for straight seam, the lesser grip on the right side of the fabric will create undue flapping of fabric (Figure 3).
Presser foot for tighter/smaller curves
A narrower presser foot for tighter, sharper and smaller curves (Figure 4) is preferred. All because the area of contact in front of the needle grips the fabric; and firmer this grip is, the more difficult it is for the operator to turn the fabric. A narrow toe of the presser foot grips the fabric on a smaller area, making it easier for the operator to control curved fabric closer to the needle point. The sharper the curve, smaller and narrower presser feet would obviously become more suitable.
Hinged presser foot
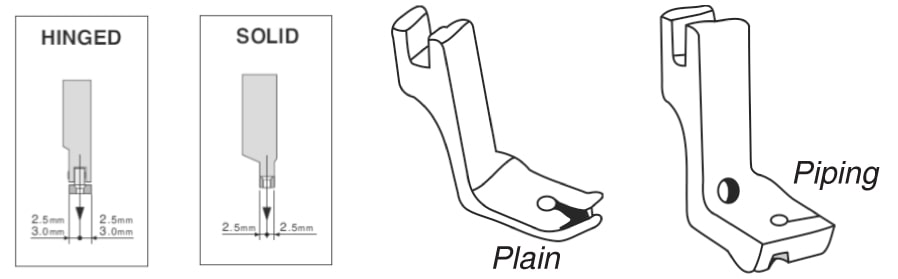
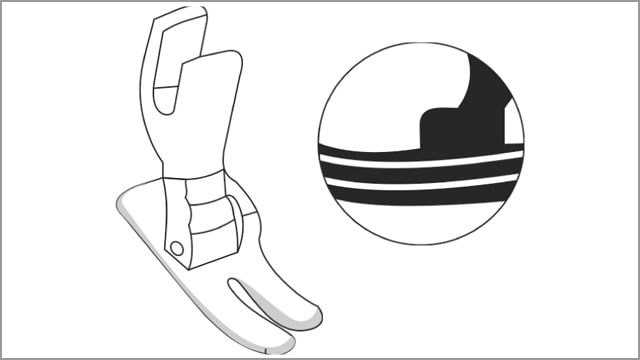
Most of the presser feet used in factories today is hinged. Even the earlier mentioned presser feet for straight and curved seams are hinged. A hinged presser foot is moulded in 2 separate pieces (body and toe) joined together by means of a hinge. Such presser feet gallop while seam is being stitched (an effect commonly called cantilever effect). Since the presser foot is hinged, it is free to perform motion somewhat similar to human foot while walking. Hinged presser foot can be used for all sorts of seams, but it is especially handy while stitching crossover seams (seam over seams) or any other seam where thickness varies. The cantilever effect compensates for the uneven thickness rendering a perfect seam.
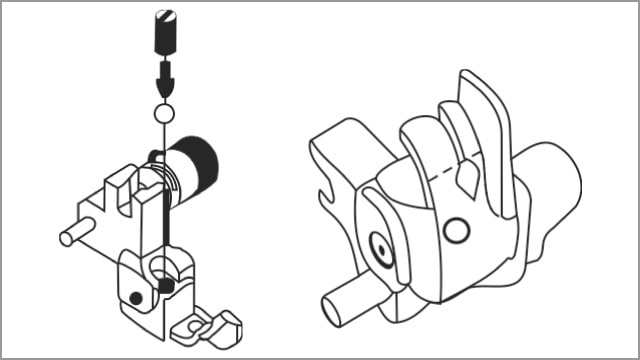
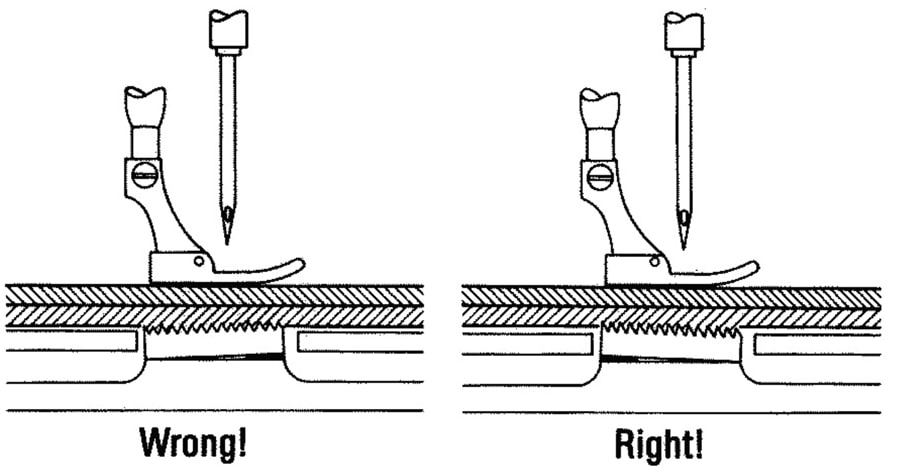
The dynamics of hinge position in a presser foot is analogical to a see-saw. The longer the arm length of a see-saw is, lesser is the pressure required to press the arm and vice versa. Similarly, when the hinge is close to the needle penetration point, the pressure applied by the presser foot on the fabric is higher which is good for medium to heavy weight fabrics (Figure 5).
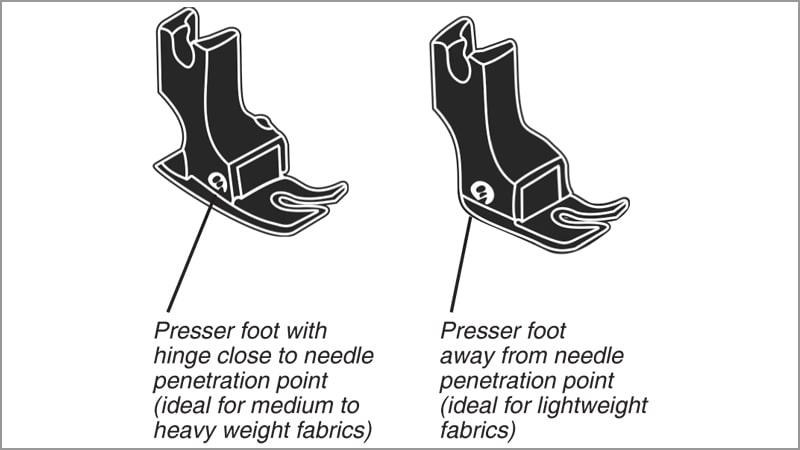
For lightweight fabrics, use a presser foot with the hinge away from the needle penetration point so that the pressure on the fabric is less.
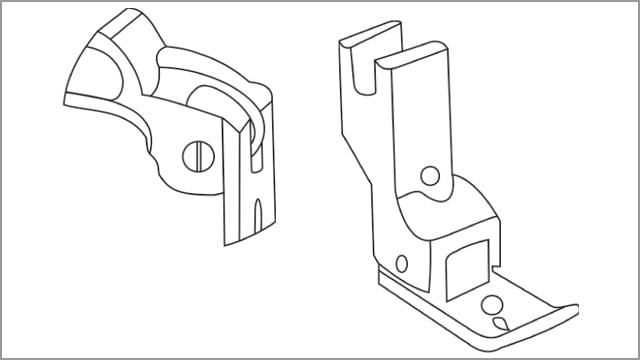
Non-hinged presser foot
Non-hinged presser feet/solid presser feet (Figures 6 & 7) are used for attaching pipings, cordings and zippers where they provide more stability as they don’t gallop. To use them, the garment should not have any cross seams to pass over or any thickness variation otherwise there is a possibility of fabric damage.
Compensating Presser Foot
Seams that involve top stitching, fabric thickness in both sides of needle is different, and to accommodate the fabric thickness, a compensating presser foot is best suited. For this, the compensation presser foot has one toe free to move up or come down adjusting to the thickness of the fabric. Also they have a guide in the toe which is used to maintain the even seam margin while top stitching.
These feet are of two types, namely – CR (Compensating Right) and CL (Compensating Left) with various sizes varying from 1/32” to 1/2”.
There are also many other types of compensating presser feet specific to a particular application:
A presser foot (see Figure 8) which has the right guide in contact with edge of fabric in front allow sudden meandering and turning of fabric, while the left toe and heal is feeding the fabric.

The presser foot (Figure 9) with an extremely small toe in front of needle reduces the grip in the front to make it easier to take turns while top stitching on curves.
For faster and stable top stitching of profiles, i.e. fused collar/cuffs with uniform seam allowance, a presser foot with guide in front of the toe is preferred (Figure 10).

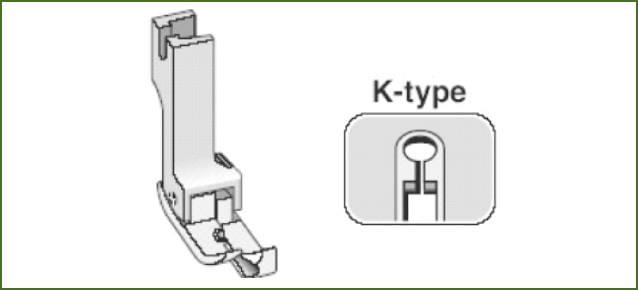
The presser foot with a longer right toe (K type) makes it suitable for light fabric and knit fabric which are more prone to flapping (Figure 11). The extra grip on the right prevents any fabric flapping.
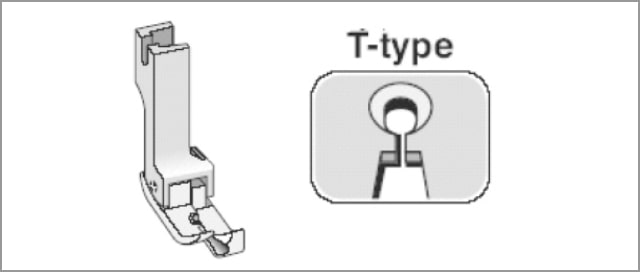
Dense fabrics where structural jamming of fabric causes puckering, broader area near needle hole (T-type) allows displacement of yarns of fabric thus reducing the visual distortion and structural jamming of fabric near needle hole (Figure 12). It is different from the K-type (Figure 11), as it has a broader needle hole which accommodates the displaced yarns when the needle penetrates.
Presser feet with narrow toes (see Figure 13) are suitable for top stitching on narrower plies with less area.
In the I-type presser foot (Figure 14), the area of contact in front of the needle is more. Moreover, the feed dog is light weight, making it suitable for light weight fabric. More grip in the front also prevents the slipping of fabric and gives more control.
The presser foot with a dual adjustable hinge (Figure 15) whose position can be adjusted on the front and back side heals is a special anti-puckering type presser foot for light fabric.
So it can have controlled double cantilever effect (on the front and back as well).
A special presser foot-needle plate combination is meant for controlling/reducing puckering which occurs due to feed dog/needle plate/presser feet. While stitching, lower ply usually tends to feed more than upper ply as it is in direct contact with the feed dog, which causes puckering. In this setup (Figure 16) the lower ply is tensed due to springy plate in front of the needle. Moreover, this springy plate prevents any ply slippage during sewing. The presser feet with specially created spring reduces pressure on the fabric at the time ofstitch forming.
The presser foot with one side narrow feet is best for manipulating curves. The part of the presser foot on the right side of the needle is thinner, allowing the operator to feed and manipulate fabric for ease of operation at curves (Figure 17). Similarly, presser feet with left side narrow are also available.
Special presser feet
Presser feet for small curves – This presser foot has a special ball beneath it which makes it possible to turn the fabric sharply. (Figure 18)
Presser foot for ditch stitch (Figure 20) – This particular type of presser foot has a guide on the right toe to ensure that the stitch being formed falls exactly into the ditch in the waist band.
Sliding presser foot – This presser foot slides with the movement of feeding in elliptical motion, in direction of feed dog (Action can be called floating type, thus reducing feed pucker). It is used for stretchable fabrics which are prone to pucker and where lower ply gets damaged because of stretch (for example Bias or Crepes). (Figure 21)
Transparent presser foot – Wherever engineered (precise) matching of checks and stripes is required, it is difficult to see under the presser foot. For such cases special see-through plastic presser foot with Teflon sheet are available.
Feed Dogs
Feed dogs are the feeder mechanism in a sewing machine right under the presser foot which are used to pull fabric through a sewing mechanism. Typically resembling two or three short, thin metal bars, crosscut with diagonal furrows, which move in a elliptical motion within the grooves of the throat plate/needle plate. The feed dog also regulates the stitch length.
Selecting the right feed dog and needle plate for thin and thick fabric (light to heavy)
Heavier the material, bigger is the feed dog pitch (teeth per inch) and thicker is the needle; also the bigger needle-hole size. Besides, feed dog have number of rows with varying sizes with the matching needle plate for specific applications in different pitches and needle hole sizes.
General Adjustments applicable to feed dogs
Front and back adjustment – In all sewing machines the static position of feed dog (when no stitching takes place) can be shifted towards or away from the operator to adjust the pulling or pushing action of the fabric and any other undue movement or flapping of the fabric.
Up and down adjustments – The height of the feed dog is adjustable. Higher the feed dog more is the feeding.
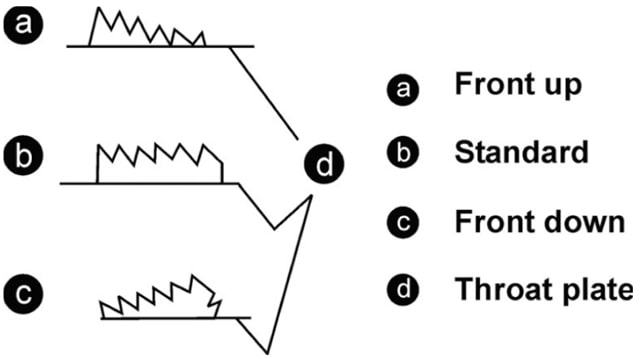
Slanting forward and backward adjustments – When the feed dog is tilted so that the rear portion is elevated (up) and front portion down, then we get the pulling effect, resulting in less puckering. Reverse setting increases puckering (this is done to create gathering effect).
Feed Dog Textures
Angular cut and Diamond cut feed dogs (Figure 24) are usually used for sensitive fabrics which are likely to have grain damage. The point of contact is on a bias so the teeth of the feed dog touch multiple warps and wefts.
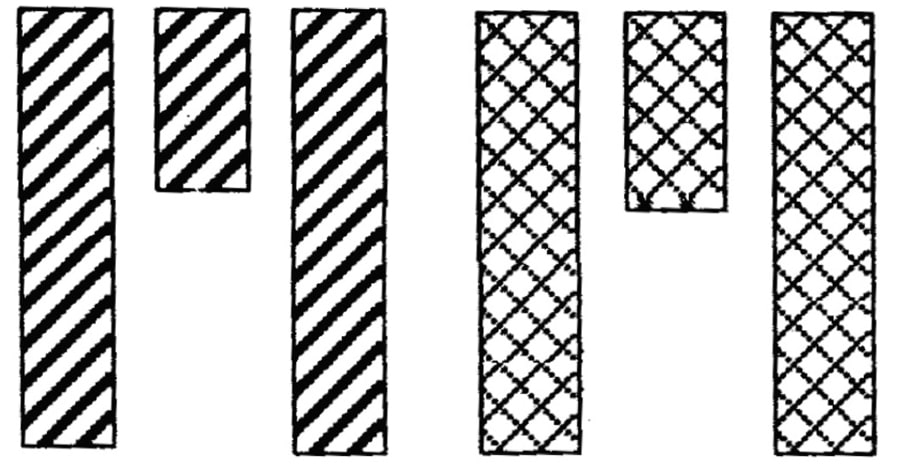
Diamond cut feed dog is usually preferred on crepes like georgette, chiffon or fabric with lots of grains to reduce their flattening.
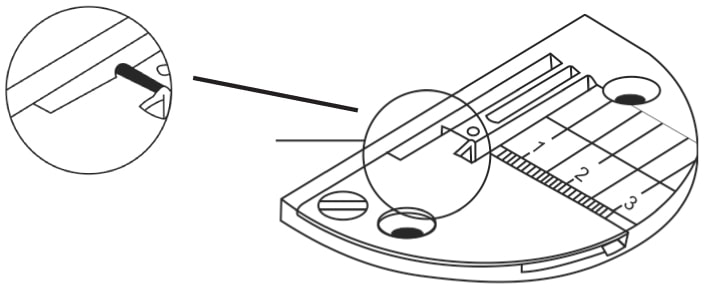
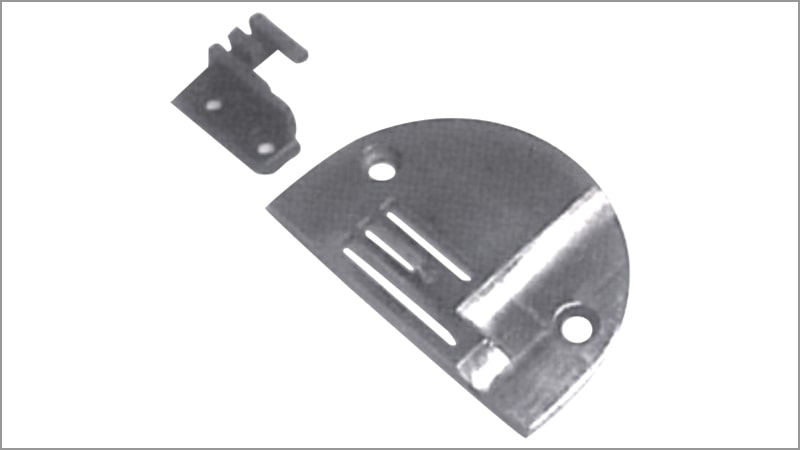
Needle Plate
The needle plate (or throat plate ) is a removable part, which protects the bobbin and underside of the sewing machine. The throat plate has seam guides. Always verify that the machine seam guide is accurate with the needle position you are using. Many newer machines have built in visibility of the bobbin area so you remember to fill the bobbin before starting a long seam. The throat plate is devised with hole to allow the needle to penetrate into the fabric and slots to allow the feed-dog to emerge from underneath.
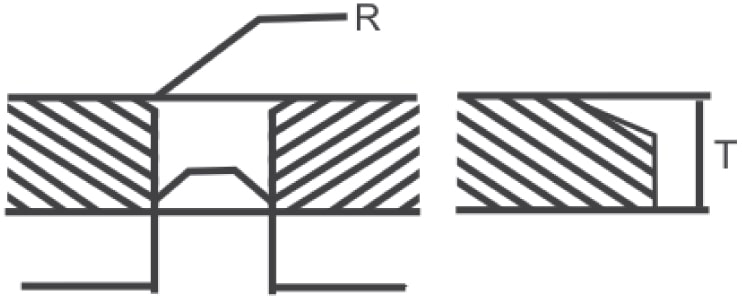
Needle plate chamfering for stitch stability
Each needle plate has radius (shown as R in Figure 25), which is called chamfering of needle plate. It is responsible for stitch stability. The radius of chamfering depends on the kind of fabric, needle size and thread thickness. At the time of piercing, fabric goes down the needle hole to an extent and this chamfered radius allows warp and weft of the fabric to spread within the chamfering radius, thus reducing the flapping action.
Needle plate for folders and binders
Fabric has the tendency to unravel or bounce back specifically when folded before actual stitch formation (Figure 26). So, the aim while feeding in from binders/folders is to deliver fabric closest to needle to minimize/ eliminate unraveling.
Folders usually are to be fitted on the machine bed plate. They have got some thickness and they usually deliver the fabric at a higher angle than the needle plate, thus allowing the fabric to relax between needle plate and the folder. So, to avoid the higher angle, front portion of the needle plate is chamfered (cut down) so that folder can be placed in the chamfered portion to deliver the fabric as parallel to the needle plate as possible. These are usually available with 3 to 6 rows for different widths of the folding material to be fed at higher speeds.
The first prerequisite for a perfect seam is correct feeding; therefore an accurate control of fabric under the presser foot by the operator is very important
To use non-hinged presser feet, the garment should not have any cross seams to pass over or any thickness variation otherwise there is a possibility of fabric damage
Wherever engineered (precise) matching of checks and stripes is required, it is difficult to see under the presser foot. For such cases special see-through plastic presser foot with Teflon sheet are available